Private Revit Training Online: Tutors & Pro Services


We are a team of tutors and freelancers that are hireable on an as-needed basis for professional help with your projects.
Enhance your Revit skills with 1-on-1 custom training online or receive professional Revit services. Schedule a free 15 minute consultation.
3 Types of Service
Tutoring
Customized 1-on-1 tutoring sessions. Don't waste time & money in class. Learn only what you need for your specific projects, and nothing more!
Collaborative
Share screens with us to cut costs and learn along the way. More communication increases our understanding of your project.
Contract
Hourly rate or fixed price for agreed upon deliverables and deadlines.
Our Revit Tutors & Freelancers
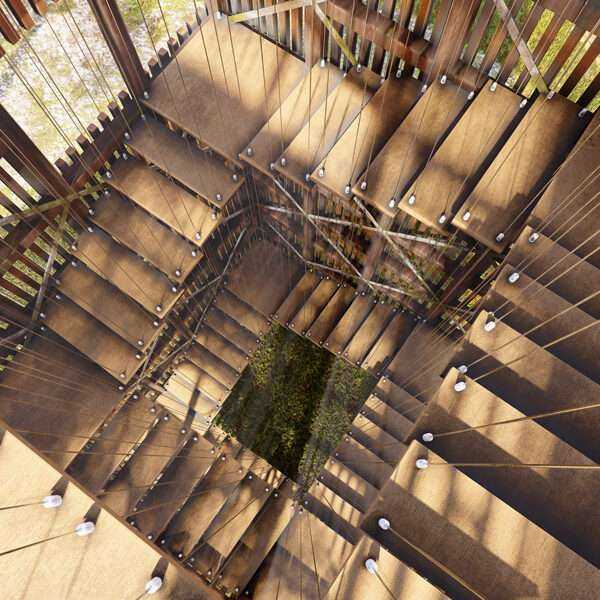
Revit Gallery
0 Reviews for Tutors & Services
Revit Services We Provide
Rendering and Visualization
Rendering and Visualization helps you bring your designs to life by transforming complex 3D models into stunning, photorealistic images and animations. This sub-service leverages Revit's advanced rendering engine to provide detailed visual representations, enhancing presentations, client proposals, and overall project comprehension.
Building Information Modeling (BIM) Coordination
Building Information Modeling (BIM) Coordination ensures that all disciplines' design and construction models are integrated seamlessly using Revit software. This service facilitates effective collaboration among project stakeholders by resolving clashes, optimizing workflows, and maintaining project standards, resulting in efficient project delivery and reduced errors.
Parametric Family Creation
Parametric Family Creation involves designing and developing Revit Family components with flexible parameters that can be easily adjusted and customized to meet specific project requirements. This service enhances efficiency by enabling the reuse of detailed, adaptable building elements, ensuring consistency and optimizing the modeling process.
Structural Analysis
Structural Analysis in Revit allows engineers and designers to perform comprehensive evaluations of building structures. This sub-service integrates advanced analytical tools for assessing loads, forces, and stresses within structural components, ensuring compliance with safety standards and optimizing material usage. By leveraging precise data, users can predict structural behavior, enhance design accuracy, and facilitate efficient project execution.
MEP Design and Analysis
MEP Design and Analysis involves the comprehensive planning and simulation of Mechanical, Electrical, and Plumbing systems within a building using Revit. This service supports the creation of detailed drawings and models that enable efficient and accurate design, clash detection, and performance analysis, ensuring seamless integration and optimal functionality of all MEP components.
Construction Documentation Creation
Construction Documentation Creation involves developing detailed and precise plans, elevations, sections, and construction details using Revit software. This service ensures all project information is accurately represented and easily accessible, facilitating efficient communication and execution for all construction phases.
Not sure what you need?
Contact us, and we can point you in the right direction.
About Our Tutors
ON-DEMAND PROFESSIONALS
We are a team of tutors and freelances that are hire-able on an as-needed basis for professional help with your projects. Call us with a quick question, or a big project. Our availability is flexible. We have a variety of skillsets and prices.
SCREEN-SHARE TUTORS AND FREELANCER
We teach remotely, so you can learn from the comfort of your home, from the jobsite, or from the beach! We teach classes via Zoom screen-share, so we can see each others' screens and cursors. It can take hours to search online for 1 simple piece of information, but just minutes to ask your private tutor. Don't struggle alone, get help from a real person online!


Some of our Top Tutors and Freelancers
Remote & On-Demand Help
Revit Tutors and Services
Get on demand Revit classes! We are a team of tutors and freelancers that are hire-able on an as-needed basis for professional help with your projects. Call us with a quick question, or a big project. Our availability is flexible. We teach remotely, so you can learn from the comfort of your home, from the jobsite, or from the beach! We teach classes via Zoom screenshare, so we can see each others' screens and cursors. It can take hours to search online for 1 simple piece of information, but just minutes to ask your private tutor.
Advantages of Online Tutors and Services
Effective
The process of learning 1-on-1 with a live tutor lets you actively participate in the learning. You can immediately repeat a concept in your own words, ask clarifying questions, or demonstrate a concept back to your tutor to ensure understanding.
Efficient
Save time and resources by learning from the comfort of your home. Avoid commuting expenses and focus on learning only the tools you need with personalized lessons tailored to your specific workflow.
Recordable
No need to take notes! We record your lessons so you can replay them at your own pace later. Keep these recordings for future reference and reinforce your learning whenever needed.
Fun
Learning with a dedicated tutor makes the experience enjoyable and interactive. Discuss problems, practice together, and enjoy the human conversational element that brings life to online learning. Reach out anytime you need assistance!
Tutors & Services Philosophy
Don't Learn Alone
Professionals these days are sitting alone and staring at their computers. They spend years searching online for tools that will increase their workplace efficiency. They hunt through forums and watch lengthy videos, trying to find the right pieces of information.
Sometimes they just have one small question that would take a person two minutes to answer, but customer support lines are a thing of the past. Big companies will direct you to an FAQ that will hardly begin to answer your question.
Bring Back the Human Connection
We strive to bring human connection back to the work environment. Our tutors work directly with you to solve your problems, similar to the way an apprentice works hand-in-hand with a skilled professional.
Screen-share technologies like Zoom have allowed us to work together in real time. We can see each others' screens and cursors. We can switch from one screen to another to easily share information. We can even turn on our webcam for a more human interaction.
Tutors, Services, or Both
Sometimes our clients want to learn a program from beginning to end; sometimes they completely hand over the services to us; and other times, they want something in between.
Some clients want to be able to use the program on a basic level and let us do the hard stuff. Others want to co-work with us, supervising our work to ensure their artistic vision is realized. Along the way, they may learn some tools of the trade.
By the end of the process, some clients are able to wean themselves completely off of our services and are empowered to do the work themselves. If they get stuck or behind on a deadline, they use us as a lifeline. They can call anytime—even if it’s just a 10-minute question—we are here to help.
Revit FAQs
How does Revit handle collaboration between multiple team members on a project?
Revit handles collaboration between multiple team members on a project through its Worksharing feature, which allows multiple users to work on the same central model simultaneously by using local copies of the shared project file. Changes made by team members are synchronized with the central model, ensuring that everyone has access to the most up-to-date information. Additionally, tools like BIM 360 can facilitate cloud-based collaboration, providing further coordination and management capabilities.
What are the system requirements for running Revit?
The system requirements for running Revit include a 64-bit Microsoft® Windows® 10 operating system, an Intel® i-Series, Xeon®, or AMD® Ryzen™ 3.0 GHz or higher processor, 16 GB or more RAM (32 GB recommended), a DirectX® 11 capable graphics card with Shader Model 5 and at least 4 GB of video memory, 30 GB of free disk space, and a display resolution of 1920 x 1080 with
What file formats can Revit export and import?
Revit can import and export various file formats, including DWG, DXF, DGN, SAT, and SketchUp (SKP) files for 3D modeling; IFC for interoperability with other BIM software; and FBX, NWC, and OBJ for 3D rendering and visualization. It also supports formats such as DWF, DWFx, PDF, and images (JPG, PNG) for documentation and presentation purposes.
How can I create custom families in Revit?
To create custom families in Revit, follow these steps: 1. Open Revit and go to the "File" tab. 2. Select "New" and then "Family" to open a new Family Editor file. 3. Choose the appropriate family template based on the type of family you want to create. 4. Use the Family Editor tools to create the geometry and parameters of your family. 5. Define the family parameters to control the dimensions and properties. 6. Use reference planes and already
How do I create and manage sheet layouts in Revit?
To create and manage sheet layouts in Revit, follow these steps: 1. To create a new sheet, go to the "View" tab, click "Sheet Composition," and select "New Sheet." 2. Choose a title block from the available options or load a new one. 3. To place views on the sheet, open the sheet view and use the "Insert" or "Drag and Drop" method from the Project Browser. 4. Arrange the views by clicking and dragging to the desired
How can I perform a clash detection in Revit?
To perform a clash detection in Revit, you would typically use Autodesk Navisworks. First, export your Revit model in a format compatible with Navisworks (NWC or NWD). Then, open the model in Navisworks, use the "Clash Detective" tool, set up your clash tests by selecting the files or objects to be analyzed, and run the detection. Review and manage the clash results using the Navisworks interface.
How can I improve the performance of my Revit model?
To improve the performance of your Revit model, consider the following tips: 1) Use worksets to divide the model into manageable sections, 2) Purge unused families and group data, 3) Use detail levels and section boxes to limit the extent of views, 4) Avoid overly detailed geometry in families, 5) Use model groups sparingly, 6) Regularly compact the central file, and 7) Keep Revit and all hardware drivers updated.
How do I create and manage views in Revit?
To create and manage views in Revit, follow these steps: 1. **Creating Views**: - **Plan Views**: Go to the "View" tab, select "Plan Views," and choose the type (Floor Plan, Ceiling Plan). - **Section Views**: Click on the "Section" tool in the "View" tab, then click in the drawing area to place the section line. - **Elevation Views**: Select the "Elevation" tool from the
How can I render a high-quality image in Revit?
To render a high-quality image in Revit, follow these steps: Set up a 3D view, adjust the view's detail level, assign realistic materials to your model, add appropriate lighting, and ensure you have a high-resolution output selected. Then, go to the "View" tab -> "Render" and choose the desired quality settings. Use "Render in Cloud" for even better quality if you have Autodesk cloud credits.
How can I link a CAD file into a Revit project?
To link a CAD file into a Revit project, go to the "Insert" tab, select "Link CAD," choose your file, and configure the import settings like colors, layers, and positioning before clicking "Open."
Revit Assistance at Your Fingertips💡
More Services We Provide
More Software we Teach
Don't Struggle Alone, Get Help From A Real Person
Call or send us a message, and we would be happy to discuss your project.
We offer a free 15 minute consultation!
